How to enter, the rooms and the rewards are on this raid's Index page.
Raid Mechanics
This is a 12 player raid.
In the first room, there are 3 buttons to operate and 4 monsters to hunt.
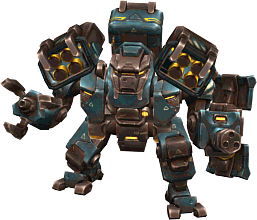
Inside the boss room, Arma restricts movement and prepares powerful attacks killing his foes in one hit.
Arma has 3 different mechanics that will occur throughout the fight:
- Arma Attacks in the four cardinal directions (indicated by a red zone on the ground) after a short delay. You have to evade the laser at all cost, it's lethal.
- High Voltage fields get deployed for a few seconds in a wide area when red circles spawn. Negate this attack by dodging but brace for it's damage if you will get hit.
 Motion Detection Bomb : Arma attaches a bomb on every second player. They get warned to cease all attacks and movement within three seconds or the bomb detonates. After six seconds the bomb diffuses.
Module Mechanic
At 70/40/20% HP Arma will spawn modules on the map.
Players have 20 seconds to defeat the modules and be granted its corresponding buff or if unsuccessful Arma will receive the buff after the timer runs out.
40% & 20% threshold all spawn a module additionally to the previous ones.
Modules are as follow:
Boss Buffs (if you're unable to kill the Modules in time)
70%
- Firepower Module
-
 Upgrade Weapon
-
- Resistance Module
-
 Upgrade Armour Plate
-
- Recharging Module
-
 Upgrade Generator
-
40%
- Shield Module
-
 Superior Shield Module
-
20%
- Repair Module
-
 Emergency Repair
-
Player Buffs (if you're able to kill the Modules in time, will be granted after time runs out)
- Firepower Module
-
Reinforce Weapon
-
- Resistance Module
-
Reinforce Armour
-
- Recharging Module
-
 Quick Movement
-
40%
- Shield Module
-
Shield Module
-
20%
- Repair Module
-
Emergency Recovery
-
Raid Map


Recommendations for the Raid
- It is recommended to go with equipment of CLv.80 r7-r8+8+9+10.
- Options of shells like:
-
S- Increased Overall Attack: x%
- S- Increased Damage to High-Level Races: x%
-
S- Increased Overall Attack: x%
- Increased Damage to Monster Races: x% wont work on act 9 bosses, since they are withered plants or rusty robots.
-
Use the
 Twilight Gem III as resistances drain is one of the best stats for raiding/PvE.
Note that all other PvE related major Trophies of each class in tier III are viable for this raid as well. -
Useful partner for debuff would be:
-
 Akhenaton the Cursed Pharaoh
-
 Curse of the Pharaoh (S)
-
-
 Amon's Specialist Partner Card
 Freya's Specialist Partner Card
 Archangel Lucifer's Specialist Partner Card
-
 Boiling Over (S)
 Freya's Announcement (S)
 Name of God (S)
-
-
 One-Winged Perti Specialist Partner Card
 Sheriff Chloe's Specialist Partner Card
 Laurena's Specialist Partner Card
-
 Blazing Armour (S)
 Targeting (S)
 Scent of the Curse (S)
-
-
 Palina Puppet Master's Specialist Partner Card
 Daniel Ducats
 Harlequin's Specialist Partner Card
-
 Concussion (S)
 Spooked (S)
 Purified Flames (S)
-
-
-
Useful partner for personal buff would be:
-
 Test Subject Specialist Partner Card
-
 Mad March Hare Specialist Partner Card
-
 Ice Princess Eliza
-
 Little Princess Venus